  |
|
In this tech article, I outline how to upgrade all 1997 to 2002 Crown Victorias with the 1995-1996 factory courtesy lighting feature.
In the 1995 and 1996 model years of the Crown Victoria, Ford integrated a courtesy lighting system into the door panel. When the door to the car was opened, this light would illuminate serving two basic purposes. The first goal
was to illuminate the ground outside the door to provide the exiting / entering occupant better visibility to the ground below. The second purpose was to provide improved safety through increased visibility to passing street traffic. 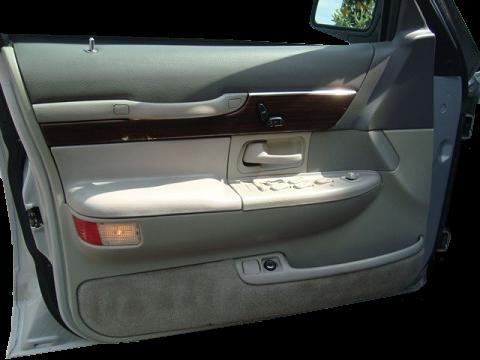 What you will need for this upgrade includes the following: - Left 95-96 Front Door Reflector (P# F5AB-13K705) - Right 95-96 Front Door Reflector (P# F5AB-13707) - Drivers Side door wiring harness, or bulb socket and harness (2x) - The following tools: Wire Cutters, Philips Screwdriver, Model Plane Glue, Dremmel. 1997-1999 Crown Victoria & Grand Marquis (Door Panels) For 1997 to 1999 Crown Victorias, this process is extremely simple and requires absolutely NO modification necessary to the door panel itself. Simply remove the 10mm screw cap on the back of the reflector, and replace with the lighted reflector / light combination. This simply replaces the existing reflector. If you are unable to order or find replacement reflectors, all 1997-1999 and some early 2000 models came with a non-functional reflector assembly that can otherwise be easily modified (see picture below). To modify these, all that's needed is to drill out the area where the bulb's socket would otherwise normally go. You can keep the red reflector if that's your preference, or replace it with a clear one if/when you come across one later at the junkyard or on eBay. Wiring will be explained below.   2000 to 2002 Crown Victoria & Grand Marquis (Door Panels) In 2000, Ford further simplified the door panels. Although they look identical to the 1999 and older door panels, they changed slightly in the way they mount and with the density of material used. The panels were essentially made a bit cheaper, but are not necessarily inferior. Because of this however, the light / reflector lenses are no longer a direct replacement for the factory supplied red reflector. The opening needed for the recessed light no longer exists. To resolve this, a little grinding will be necessary. This can be easily accomplished with the use of a dremel tool. Start by removing the door panel, and place it on the workbench. Remove the red reflector (it may need to be broken off). Place the replacement light / reflector combo on top of the door panel and trace around where material will need to be removed. It's better to start smaller and grind only as necessary. Make sure you only cut out enough space for the plastic protrusion to get through. You will need some material left to provide an area for the retainment screw. Once the fitment is acceptable, you'll want to focus on the wiring (explained below). The connectors have changed from 1998 to 1999, so this will absolutely require modification of your existing door harness. Another alternative is to look for 95-99 door panels if you don't feel confident grinding out the reflector area. 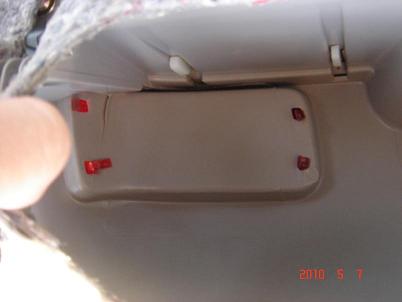 Step 2 - Trace and grind out the space needed for the new reflector. Note: it's better to grind a little at a time and test fitment than do more than is necessary. 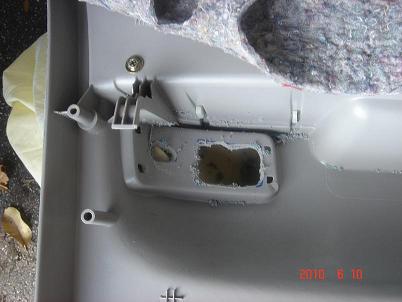 Step 3 - Ensure that you've ground enough out to leave room for the clip which allows you to remove the clear plastic piece if needed. Note: this will be useful in the future should you want to clean the area behind it, or replace the bulb without removing the door panel. 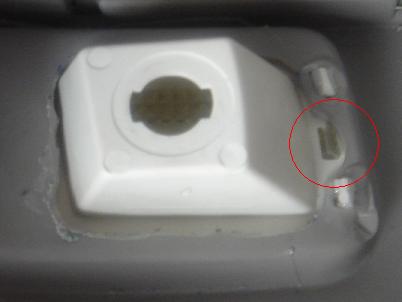 Step 4 - Once fitment has been tested, attach one side with a washer and nut, and glue the other end with modeling glue.  WIRING - Harness Modification / Replacement For 1997-1998 model years, it's easiest to simply replace the entire wiring harness in the door. The part number for this harness is F5AB-19C542-P260R. However, if you have a late 1998 or 1999 model year, depending on the options you have (like heated mirrors), this may be more trouble than it's worth. The only thing necessary is to wire into your existing floor lighting. Most Crown Victorias were equipped with a feature that's called "Illuminated Entry." If you're pulling the bulb socket and harness from a factory Crown Victoria, there will be two leads, black and black w/ red stripe. The solid black wire can be mounted to the chassis of the door. This is the ground. The black wire with red stripe should be wired into the illuminated entry harness. For what it's worth, it's not overly important since the bulb is merely a completed circuit, but for consistency sake, it's best to install it that way. The easiest way to wire into the existing illuminated entry harness is to attach it to one of the black / red striped harness wires under the dash that currently illuminate the floorboards. This is the appropriate circuit as you want these lights to only turn on when you open the door, or force the interior lights on. If you want to do a very professional and factory looking install, then you can actually make use of the factory 95-96 harness in your 2000-2002. The 95-96 harness has the bulb-harness attached to the plug. By dissasembling the harness plug, you can seperate the wires / leads for the bulb harness. The separated harness will look like this:  When the harness has been separated from the donor harness, you can make use of the two empty slots in the existing factory plug harness as shown below. This will allow for a near seamless and factory looking installation in the door.  The ground and positive wire can then be wired from the other end of the harness as described above. Please refer to the courtesy lighting diagram below for exact circuit specifications.  (Illuminated Entry - circuit diagram) FINISHING UP - Notes / Options Before re-installing the door panel, make sure you test the harness and lighting to ensure that everything is properly secured and that the upgrade is working properly. It is recommended at this time that you do any other necessary maintenance work inside your door like lubricating the door lock mechanism and the power window gears. It's also worth mentioning that you can take the time to improve the sound resistance quality of your doors. If you got these pieces at the junkyard (or are planning to), you should also pick up the jute padding from the donor door panel. This can easily be added and / or glued to the existing sound deadening material you will already have in your own door. 95-96 door panels actually have a rubberized backing, where as the 97-02 Crown Victorias do not. This helps in moisture resistance and sound deadening. If you find one of these, I suggest adding this one to the back of the existing jute padding (with the rubber facing the steel of the door). You can use simple Elmers craft glue to attach it to the existing sound deadener. If you really want to get crazy, you can spray rubberized undercoating on the inside of the outer metal door shell. Just make sure you use painters tape to mask everything off inside the door that you don't want to be coated (like the window tracts). The sound difference is night and day and will add minimal weight to your car (1-lb per door) 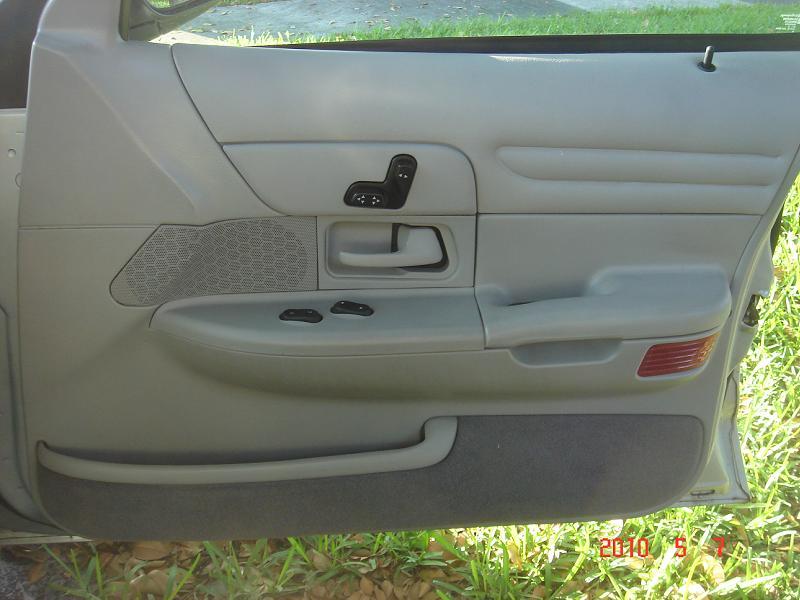 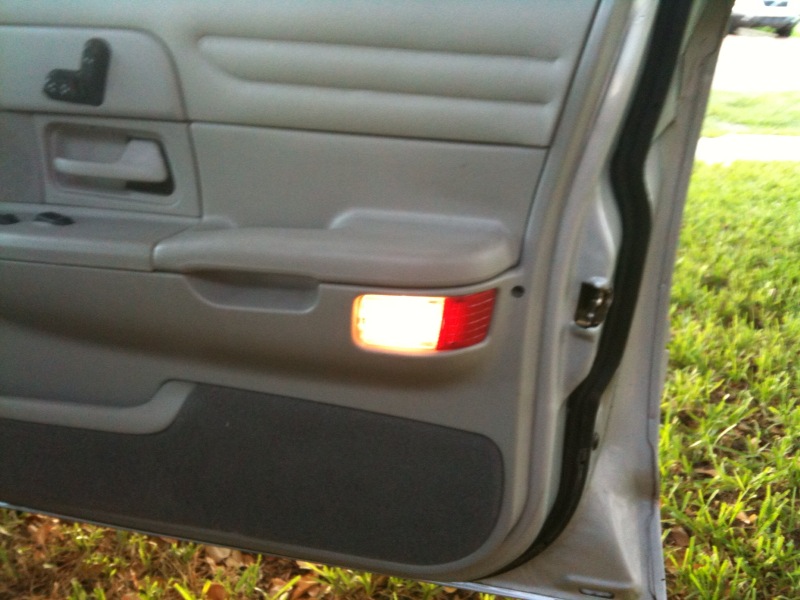 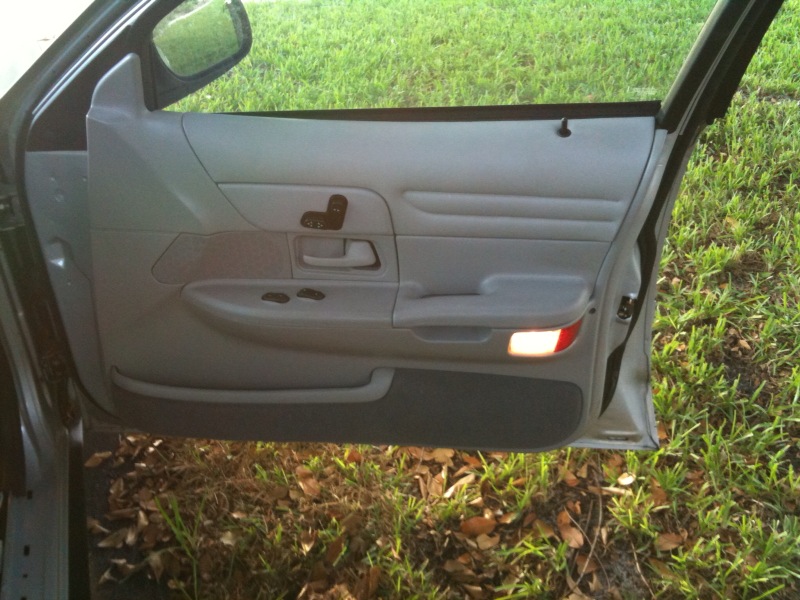 DOOR PANEL DIFFERENCES BETWEEN 95/96 and 97-02:   OTHER LIGHTING UPGRADES: - Cigarette Socket Illumination in a 2000-2002 Crown Victoria / Grand Marquis, click here: Cigarette Socket Lighting - Courtesty Floor Lighting in a Police Interceptor, click here: Floor Courtesy Lamps - Underbody Security Lighting System in a 1995-2002 Crown Victoria / Grand Marquis, click here: Underbody Security Lighting System |
|
|