| |
Memory Seat Upgrade for all 1998-2002 Crown Victorias!

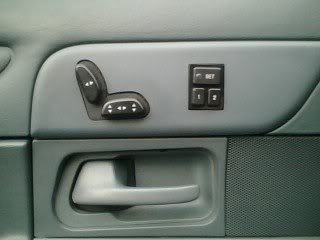
(Picture of custom memory seat buttons from LTC in Crown Victoria panel)
In this tech article, I outline how to upgrade your 1998 to 2002 Crown Victoria with the very rare memory seat option that was
originally offered in the 1995-1997 Crown Victoria and Grand Marquis. This option allows the driver's seat and mirrors to be positioned in one of three
different settings and recalled at a later time allowing for multiple driver configurations. This feature was eliminated from the option list at the end
of the 1997 model year though maintained through the remainder of production in the Lincoln Town Car. This upgrade article assumes that you already have a car that is equipped with functional 8-way power seats.
Click here for a scan of the original memory seat instructions from the 1995-1997 user manual.
(Picture of memory seat buttons / 1996)
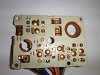
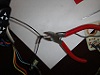
Adding the memory seat functionality is actually the easy part. The difficult part of this upgrade is making it look OEM or stock. The above image
shows the factory location for the memory switch. This switch and backing plate are
incredibly rare and was relatively uncommon for most vehicles in 1995-1997 anyway. While finding one is totally unlikely, the switches are slightly different
from the 98+ vehicles and would require slight rewiring anyway. The alternative that this upgrade proposes will work for both Crown Victoria and Grand Marqis
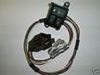
interiors. While searching for a solution, I discovered that the Lincoln Town Car's 8-way power seat switch looks identical to the ones on the 1998 and up Crown Victorias.
I ordered one on eBay and decided to compare them (see below).
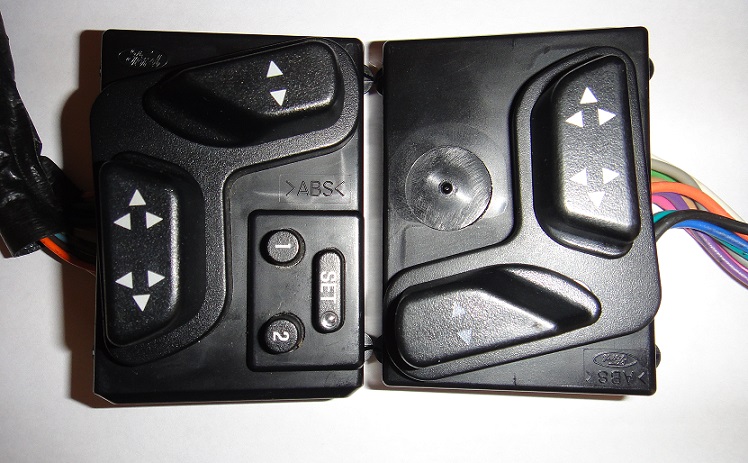
(Side-by-side Comparison (Lincoln TC vs 98+ CV)
Upon close inspection, the switch bodies are basically identical. The one from the Lincoln is 1/8th of an inch wider on one side, but is otherwise
totally the same aside from the inclusion of the memory switches. Even the mounting locations are the same.
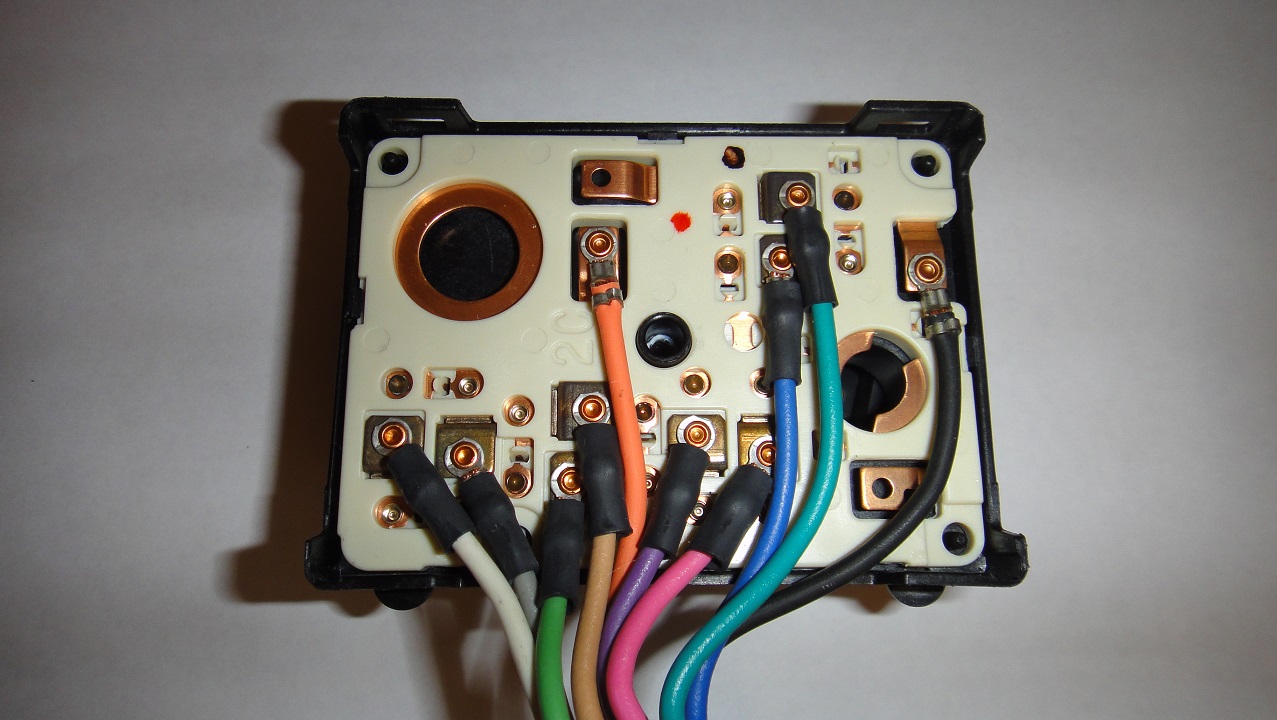
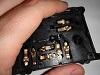
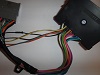
Digging further will reveal where the similarities begin and end. Dissasembly of both devices revealed that the plastic control board for the
toggle switches is 100% identical between the two panels, as are the switch controls. Wiring however, is slightly different between the TC and
CV switches. There is a different point to ground, and there appears to be one additional wire. The good news is that these boards can be
swapped eliminating the need for re-wiring your existing power seat harness. Additionally, the wires leading to the memory seat switches are
seperate on the board, and with the exception of an additional ground connection, are completely independent from the rest of the mechanism.
Swapping the boards requires great care however, as the toggle pins for the switches must be in a very specific position for the switches to
function correctly. To complete this swap, you will need three things:
* 1998-2002 Lincoln Town Car Power Seat / Memory Seat Switch
* 1998-2002 Ford Crown Victoria Power Seat Switch
* 1995-1998 Ford Crown Victoria Memory Seat Switch
INSTRUCTIONS FOR SWITCH ASSEMBLY:
 |
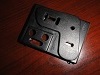
STEP 1 - The backing plate for both the TC and CV switch are held in place by four holding clips and fastened by a single
T-8 torx but screw. Removal of the screw is pretty self explanitory. When the screw is removed, you can safely
pry the holding clips away and remove the backing plate. Be careful prying the clips back on the Town Car switch
body since you will be re-using this.
|
| |
 |
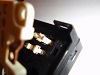
STEP 2 - After removing the backing plate, you will see the plastic switch board. This board is essentially identical
to the one in the Lincoln Town Car. At this point, you can have both backing plates removed from both switch
boxes. Do not go beyond this point however on the Town Car switch block.
|
| |
 |
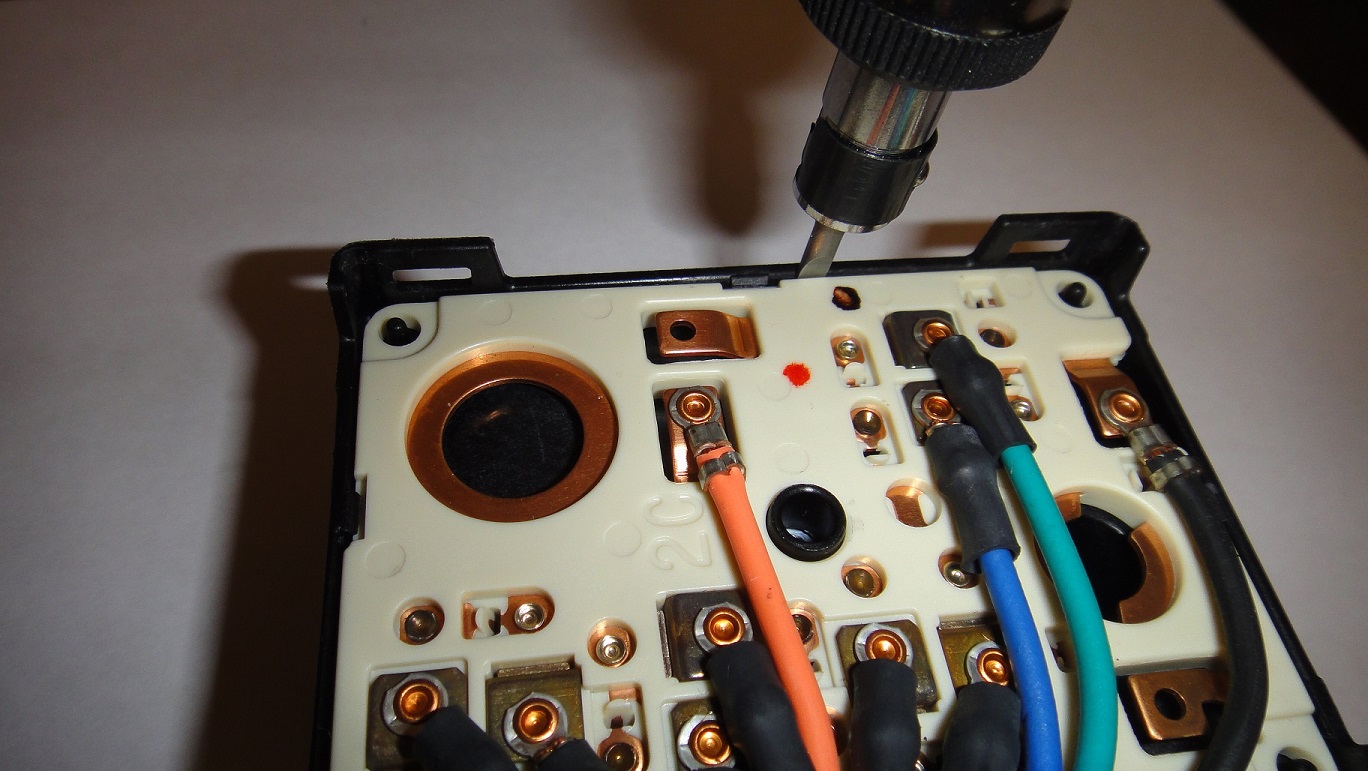
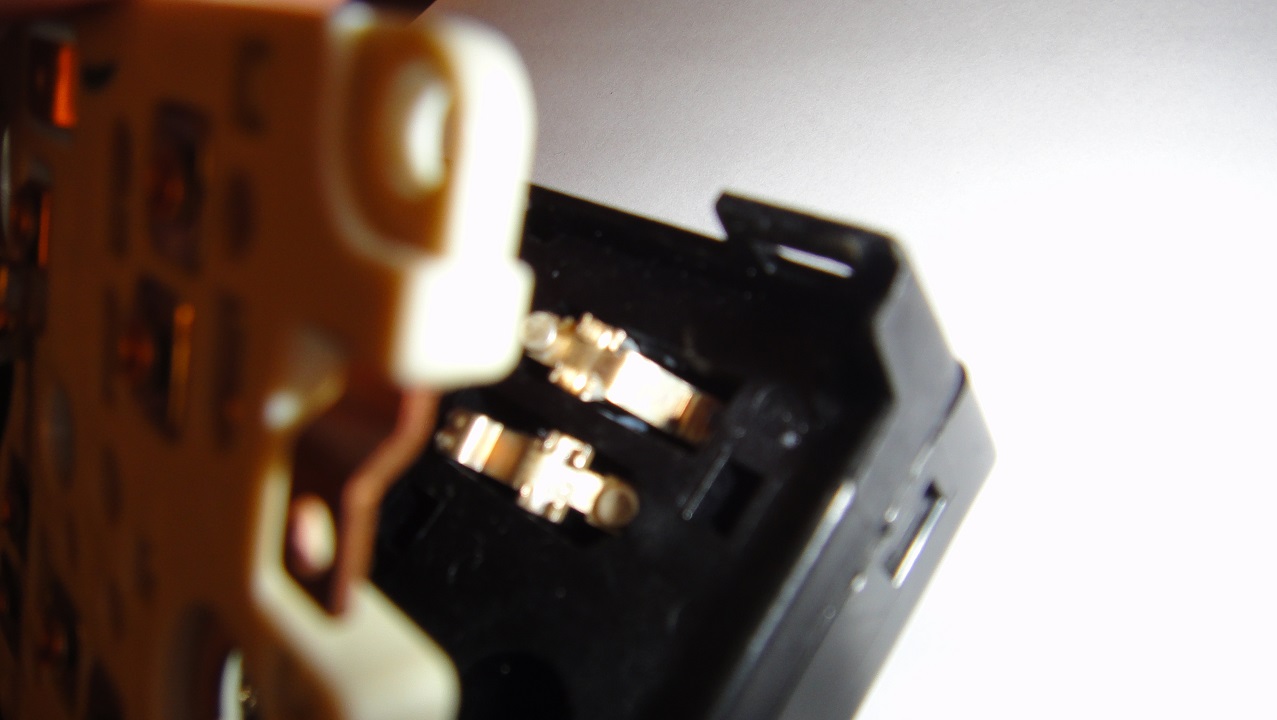
STEP 3 - You can now remove the switch board from the Crown Victoria switch block. Carefully pry the switch block away
from the top (area furthest from the wires). It should pop out fairly easily. Behind the switch board, you will
see several little clips. Be careful not to lose these as you may need to re-use them.
|
| |
 |
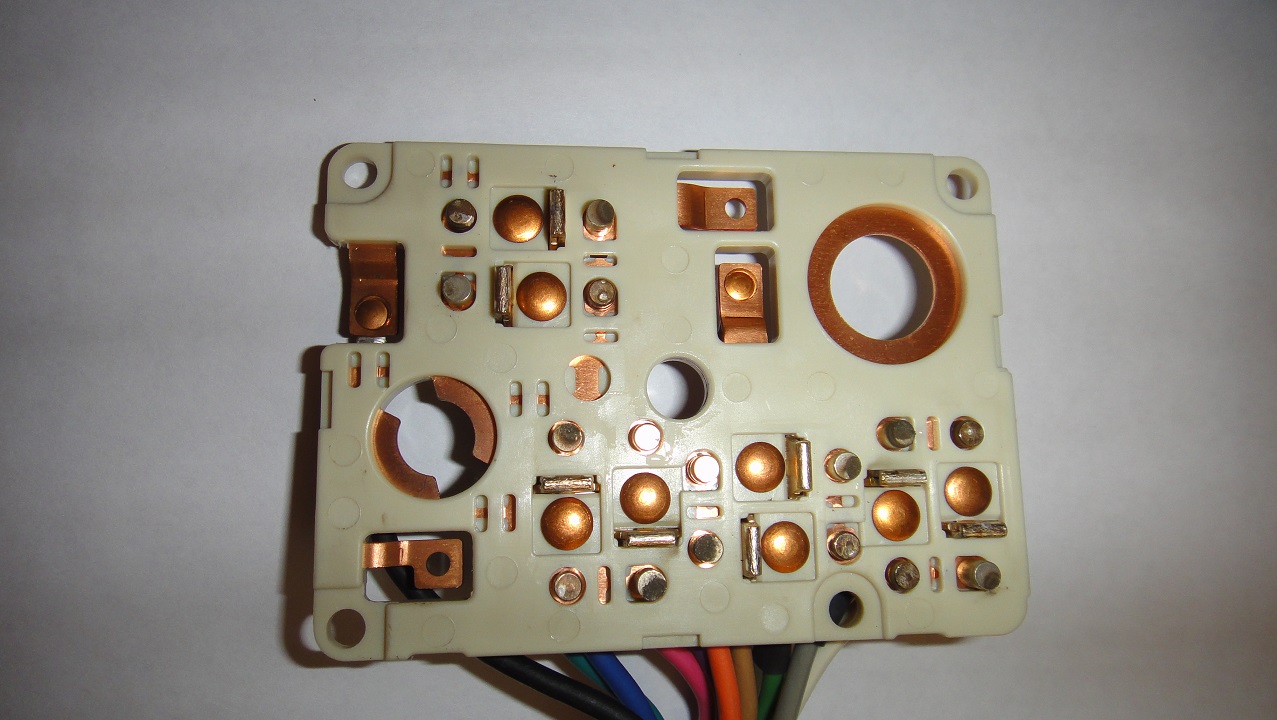
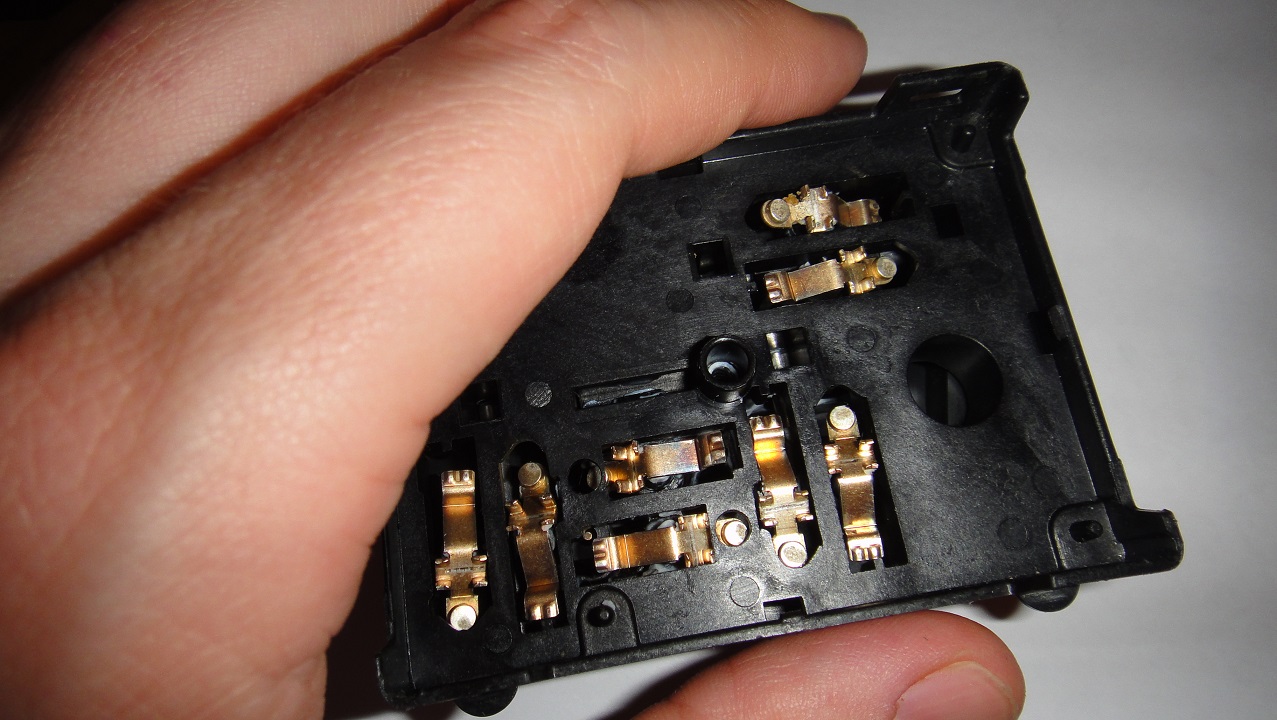
STEP 4 - Flip the switch board over and inspect the surface to ensure the contact points are not corroded. The voltage
through these contact points draw a fair amount of amperage when compared to other components, so it's important
that they are in good shape. Clean the contacts with alcohol and emory cloth, and the rest of the board with a
tooth brush and dish soap.
|
| |
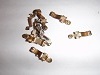 |
STEP 5 - If you are planning on re-using the clips from the switch box you just disassembled, make sure that you clean them
before re-installing them. I found it easiest to use a tooth-brush and some alcohol. Scrubbing them with a toothbrush
should get all the old grime and grease out of the cracks.
|
| |
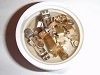 |
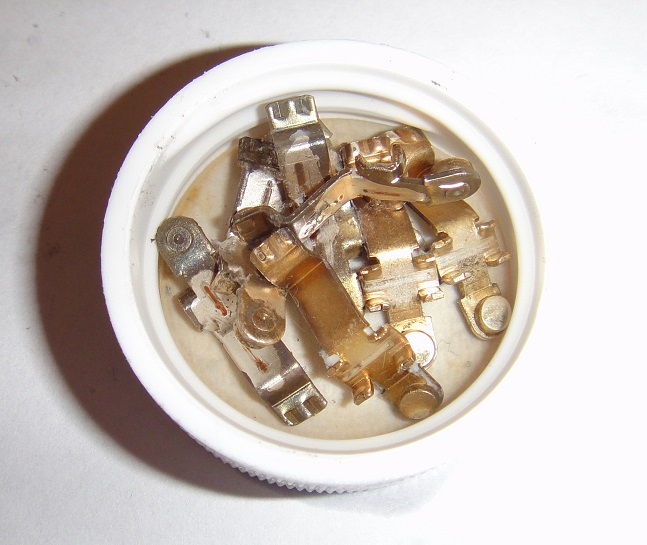
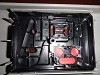
STEP 6 - After scrubbing them, I let the contact clips sit in a small soda cap filled with alcohol. You can see in the image
that the residue and corrosion simply detached from the clips and was left suspended in the fluid.
|
| |
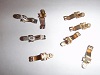 |
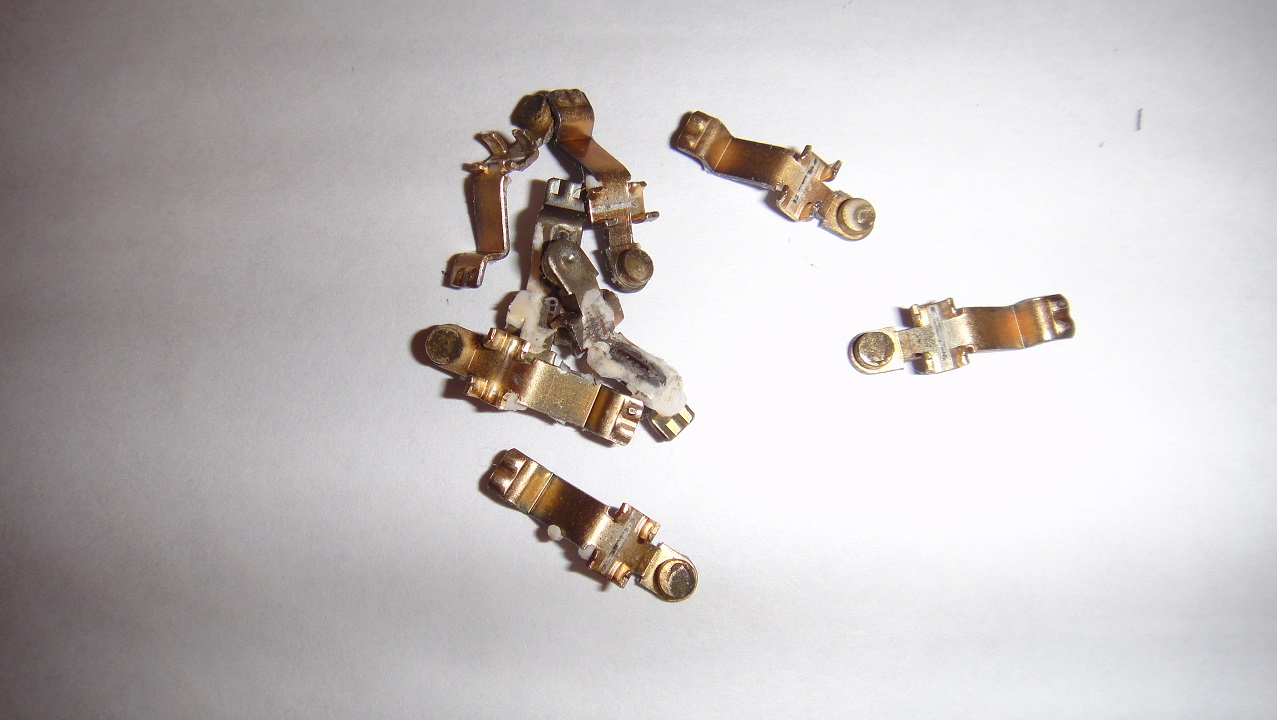
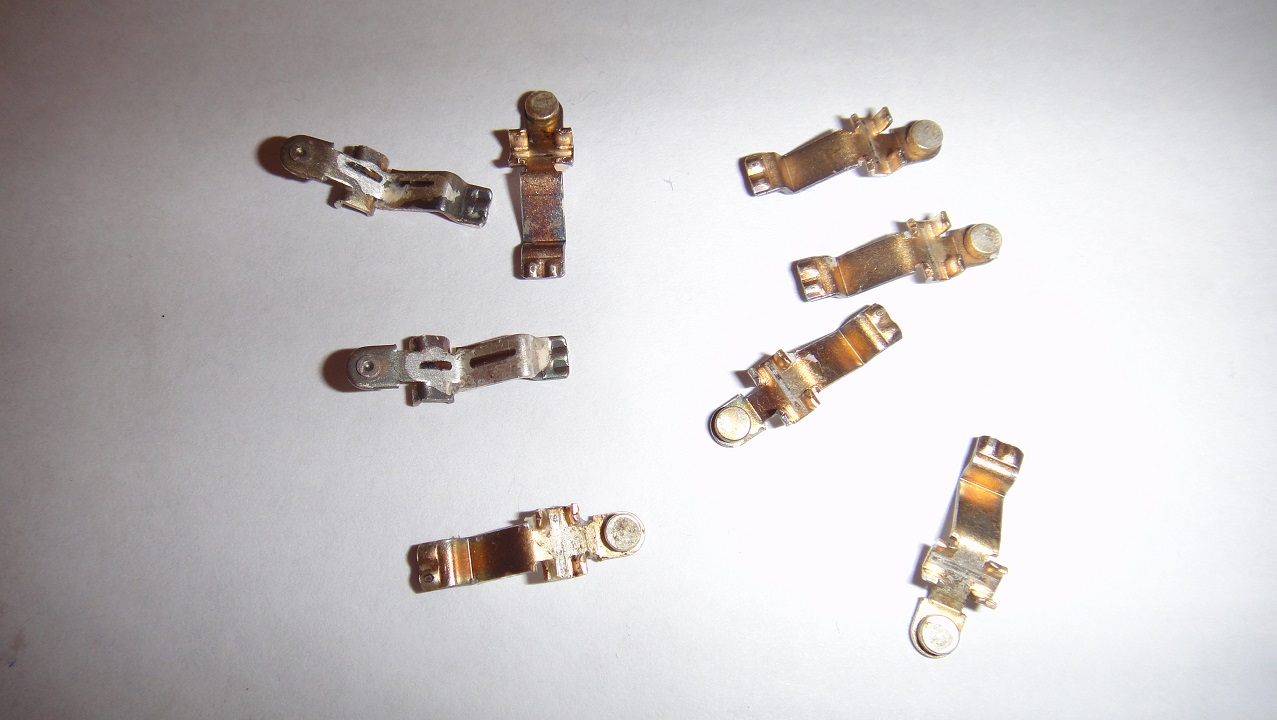
STEP 7 - After drying and cleaning the contact clips, I allowed them to dry before re-installing them. The contact points should
be completely clean. If any are pitted or damaged due to spark or arcing, then you'll want to replace them with the ones
from the other switch.
|
| |
 |
STEP 8 - Now comes the hard part. Remove the switch plate from the Lincoln switch block, and instpect the pads. Replace any or
all of them if they are worn, with the clean ones you have. To re-attach the clips, you'll want to use a liberal amount
of white lithium grease, this will help hold them in place. It may be necessary to tape the buttons on the other side to
prevent the clips from moving.
|
| |
 |
STEP 9 - When you are ready, carefully snap in the Crown Victoria switch plate and harness into the switch block of the Lincoln
Town Car. You will notice that the memory seat wires are seperate from the switch plate (mostly), so you will need to
tuck those out of the way. You may need to re-do this several times, testing the switches for proper movement, before
final assembly.
|
| |
 |
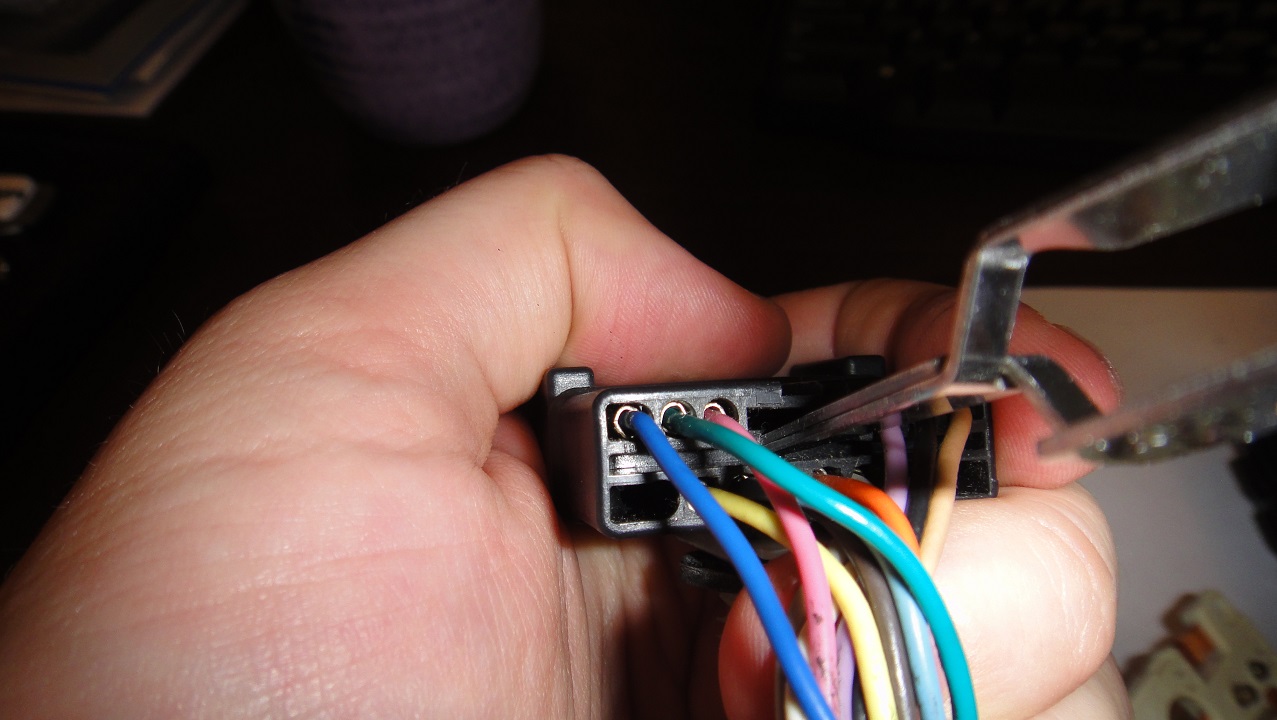
STEP 10 - With the CV plate properly installed, you should have the CV harness coming off of the switch plate that is
installed, with the old Town Car harness and plate still dangling via the wires from memory seat switch. To
un-bundle the rest of the Town Car harness to free up the memory seat wires, push the wiring clip out of the
plug from the opposite end.
|
| |
 |
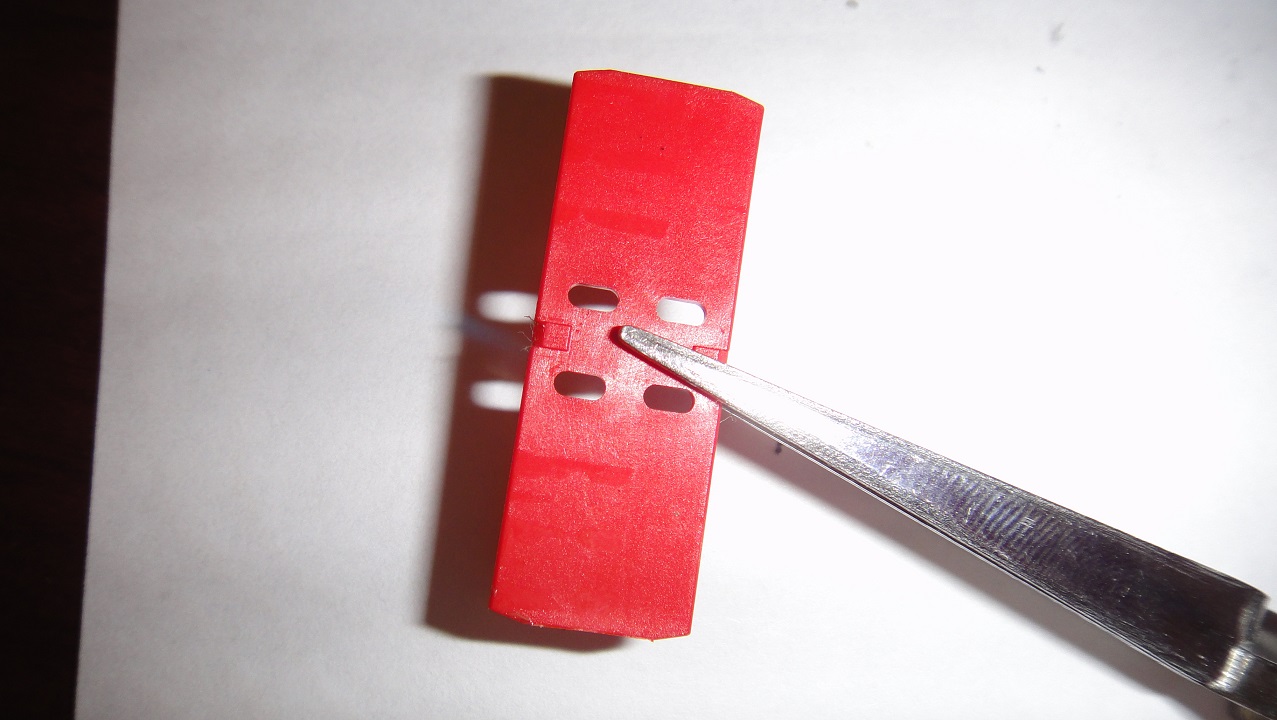
STEP 11 - As you push the clip out, it should reveal a flat red spade piece that seperates the wires. Pull this out with
needle nose pliers. It should be fairly obvious that you can now push the old wires out of the plug connector.
Each wire is held in by a little resistance clip. Pull that back, and each wire will pull out backwards one by
one.
|
| |
 |
STEP 12 - The only thing now connecting the old Lincoln Town Car harness/switch plate with the nearly assembled Crown Vic
and memory seat block, is the black ground / negative wire. This wire is shared with the memory seat switch, and
the rest of the power seat components. Cut the part off that will free the old TC harness from the rest of it.
|
| |
 |
STEP 13 - You can now re-assemble the switch block by re-installing the cap onto the back, and re-installing the T-8 torx
screw in the back. You should now have a Lincoln Town Car Memory / Power Seat switch block, with a Crown Victoria
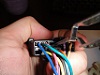
plug harness, and 5 seperate wires for the memory seat. The five loose wires are Orange, Yellow, Black, Brown, and
Blue.
|
| |
 |
STEP 14 - With the OEM 95-97 Memory Seat switch, remove the wire retaining clip like you did in step 10 and 11 for the
TC harness. Now insert the memory seat wires from the LTC switch into the now empty 95-97 Crown Victoria connector. Thankfully,
Ford used the same colors for the memory seat in nearly every vehicle, so you should be able to swap out the wires one by one.
|
| |
 |
STEP 15 - The next step is to prepare the factory Crown Victoria door fascia for modification. I found it easiest to buy a second
LTC memory seat switch (a worn / abused on) and disassemble it. I then used the disassembled face as a template for drilling and
test fitting.
|
| |
 |
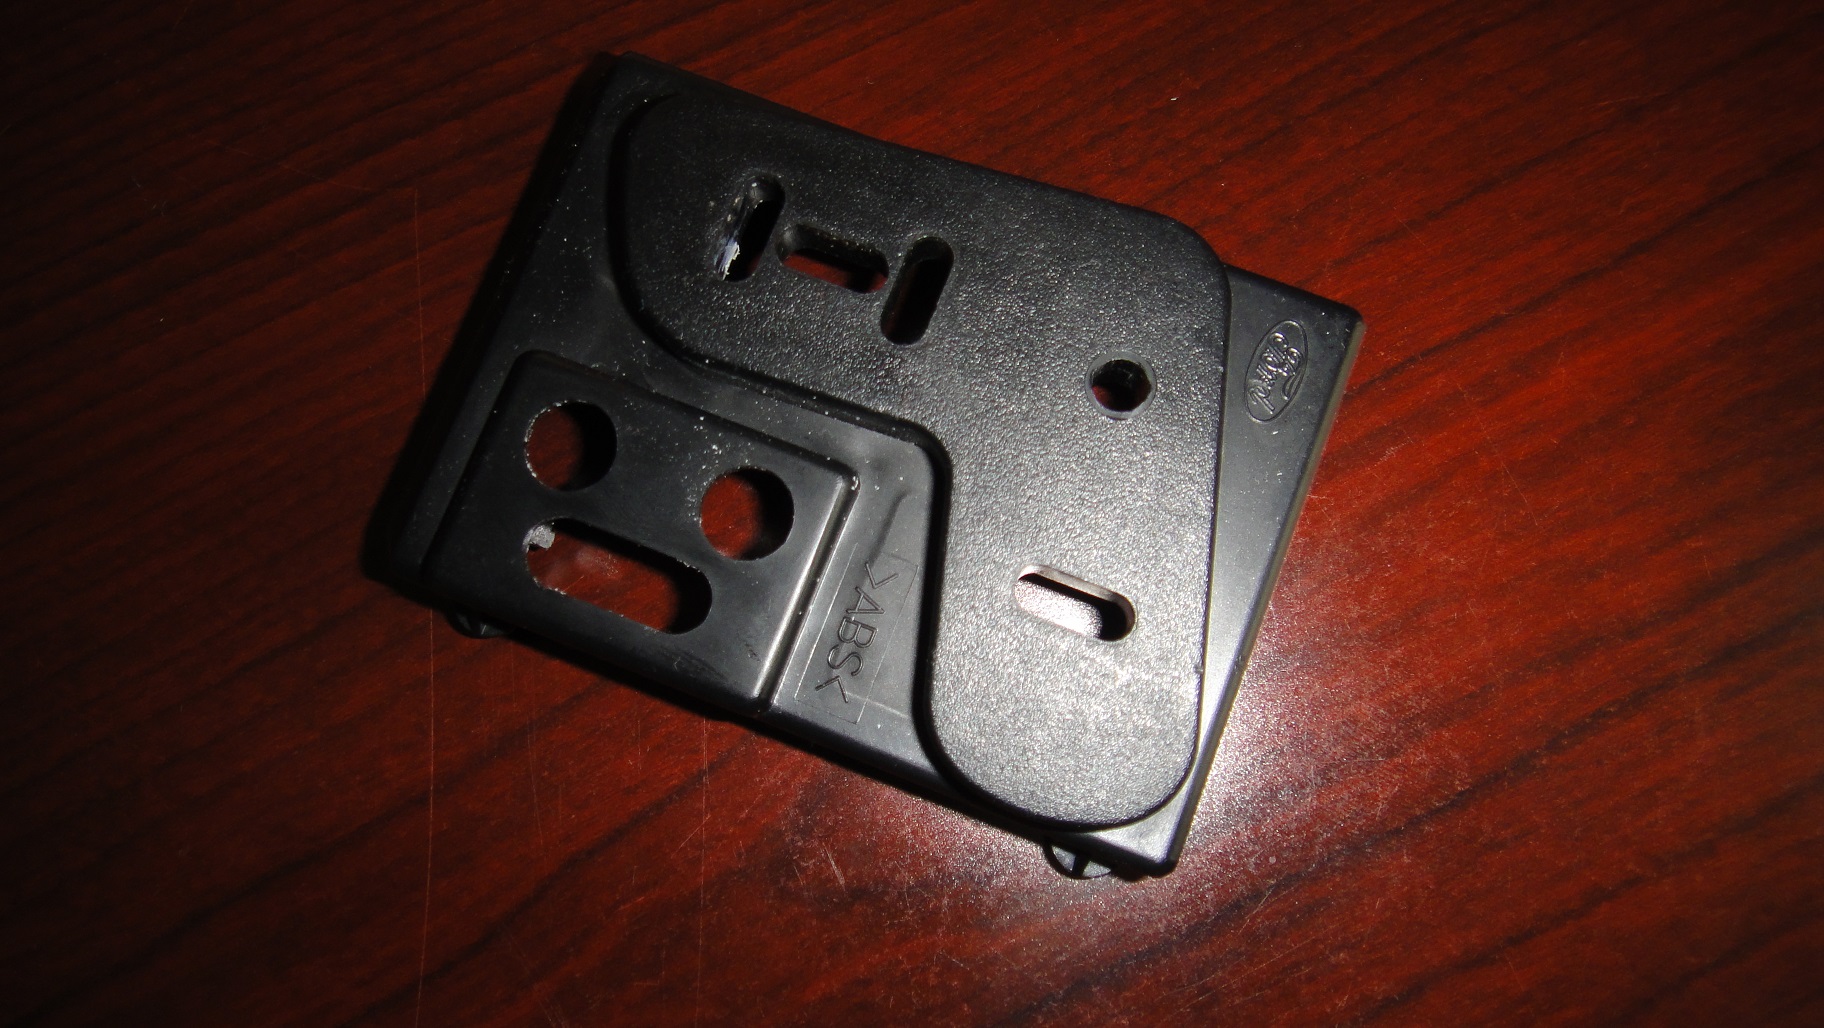
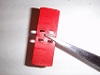
STEP 16 - Next, you'll want to trim the tabs on the side. The side you'll want to trim is the side with the memory buttons. The LTC switch
is 1/8th of an inch wider, so you'll need to account for that. Trim the center piece and slim back the two tabs on the end. The final product
should look like this when snapped in.
|
| |
 |
STEP 17 - After ensuring proper side to side fit, you'll want to install the face plate, and trace with a permenant marker the area
where you will need to drill on the fascia. It's important to try to
center the drill as much as possible, you can't put back what you take off.
|
| |
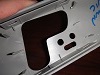 |
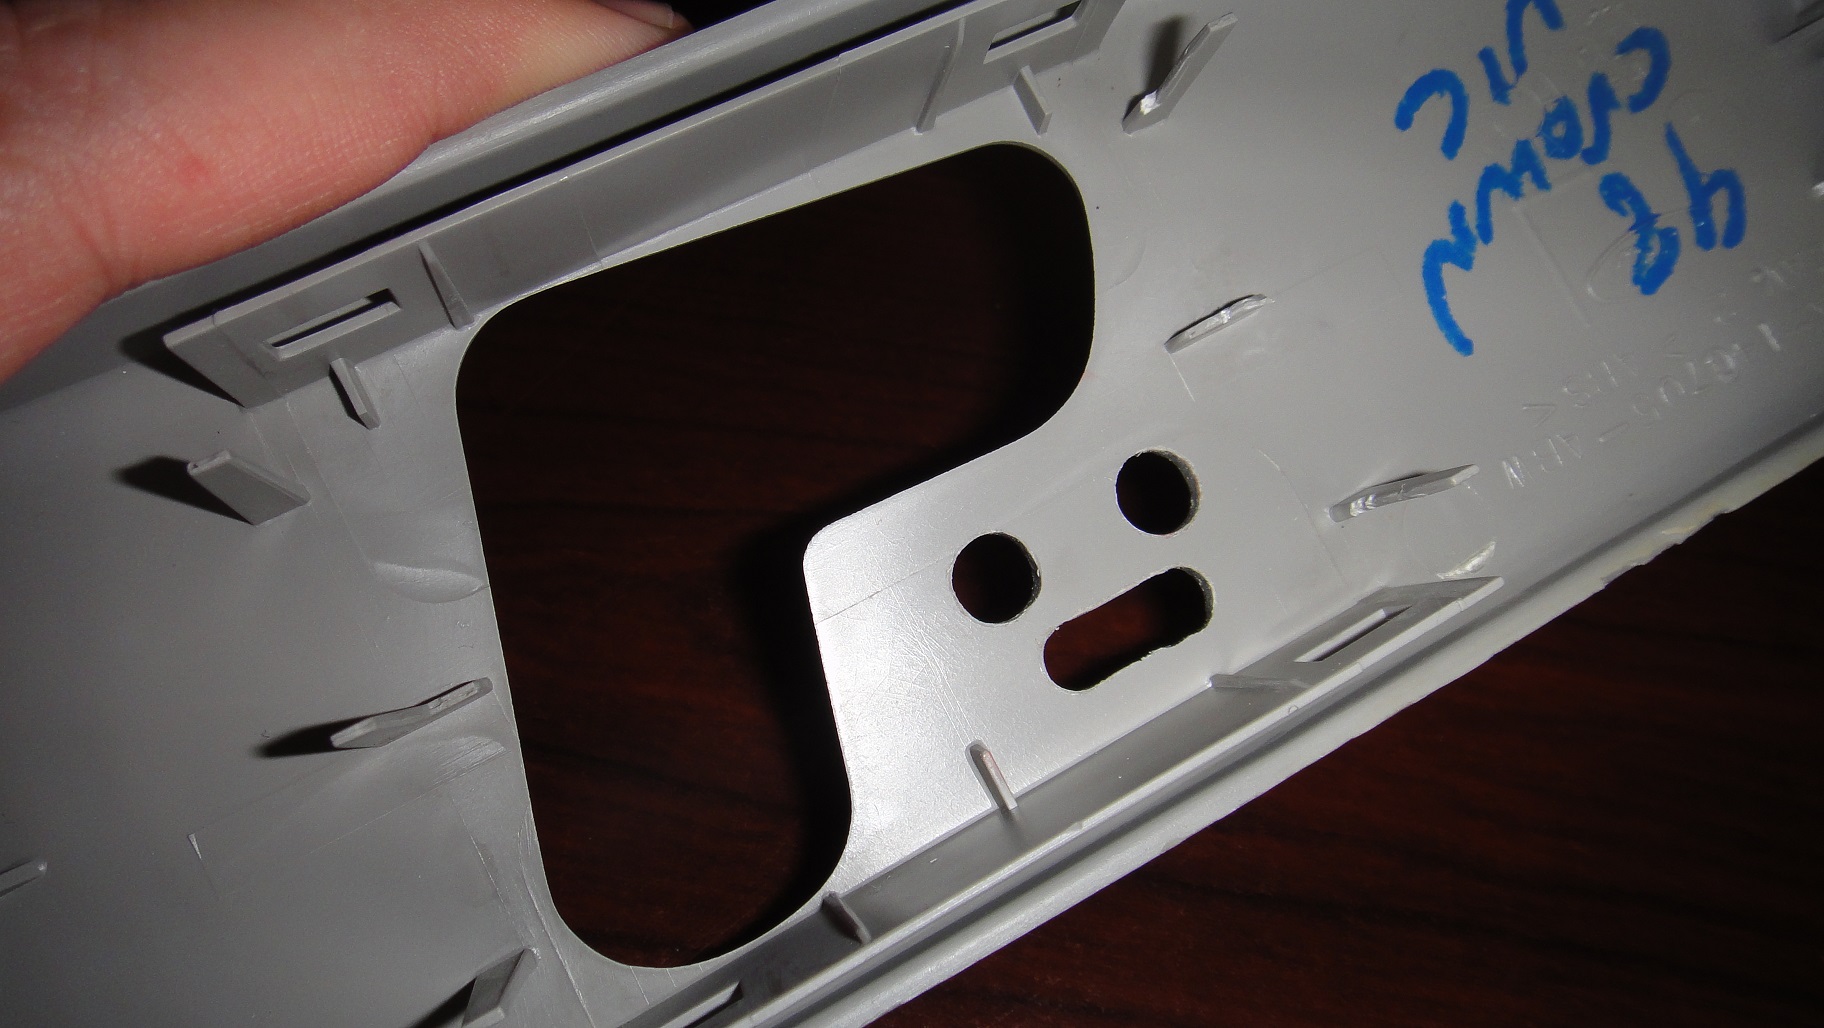
STEP 18 - When complete, the fascia should look like this. I highly recommend buying a professional metal filing kit like this one.
The files will allow you to get a more perfect round and finished look. I recommend installing and re-installing the switch to ensure
proper fitment. You don't want to take off more than necessary for proper look and operation.
|
NOTES: Couple of things worth mentioning:
* The wiring used in the earlier years of the Crown Victoria whale (~1998) seemed to have
a heavier gauge of wiring than other years (off and on). When gathering parts for the swap, it's a good idea to use these
components.
* The switch plate and switch housing appears to have been designed with lighting / backlighting in mind. There is actually
a slot built into the board for use with a twist on bulb, with a recessed area
in the switch body. I haven't looked too much into this, but it might not be too difficult to partially illuminate the
switch body.
* This swap can be done on a 2003+ as well, but the wiring appears to be slightly different. Doesn't mean it's not possible, but I have
no way to verify compatibility since I do not have a 2003 CV.
NOTE: I AM NOT FINISHED... from this point, the swap should be fairly straight forward. It will require you to swap out the seat track or the
additional pieces from the memory seat track to your seat track. The wiring should be pretty similar with only an extra few plugs for the memory seat wiring.
|