  |
|
In this tech article, I describe the installation of my custom high-end stereo system. The purpose of this installation was not to impress or to look fancy,
but instead to get the most superior sound possible from a completely stock looking stereo system. I will list in detail the components I used, the reasons for selecting these specific
items, the installation process, and the total (estimated) cost associated where appropriate.
MTX re-Q5 Bass Restoration & Signal ProcessorThis is the most important part of the system. Without this unit, the entire system is essentially worthless. OEM radios automatically supress all the lower and upper frequencies of the output channels. The factory does this to protect the stock speakers from damage. The MTX re-Q5 processor restores 95% of the original high and low frequencies, and cleans the outputs of distortion. The re-Q5 has an input harness with which you can use to tie into the outputs of your radio. I do not recommend cutting into your factory wiring however. An alternative is to buy a harness adaptor (both male and female) that will allow you to splice into the connections between the radio and the factory harness. If you have access to a junkyard, most Lincoln Town Cars have a small harness identical to this. Wires should be run from the receiver to the processor, and then from the processor to the amplifiers. Harness adaptors and connections depend upon the year of the Crown Victoria / Grand Marquis. Please note that there are alternatives to the MTX re-Q5 sound processor, however, nearly every independant study has proven this product to be the most cost effective, and efficient unit. Prices range from $175 retail to less than $80 on Amazon. Installation instructions will be provided below. The re-Q5 isn't the only option, as there are other similar systems available such as the Epicenter by AudioControl. 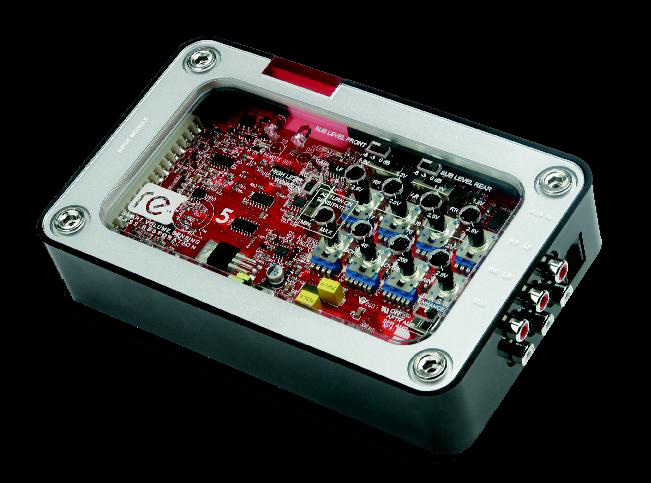
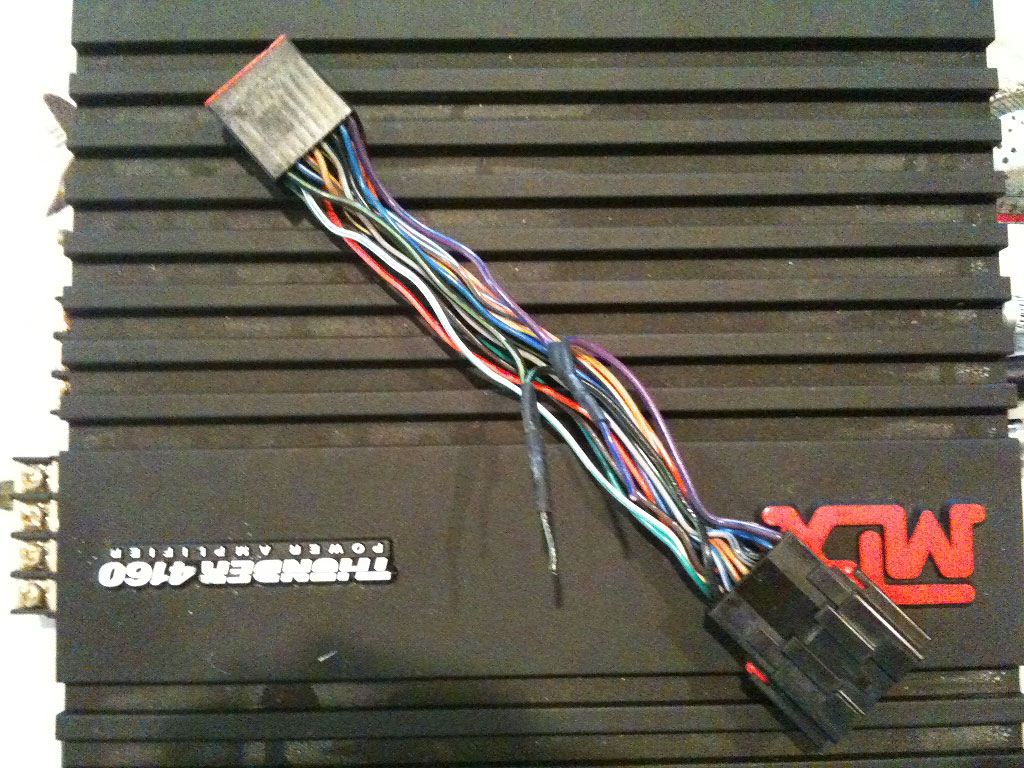
AMPLIFIERSThis installation made use of two amplifiers, one amplifier powers the four primary speakers, while the second aplifier powers the subwoofer. In my particular installation I used a pair of matched aplifiers by MTX. The model numbers are inconsequential as I bought these amplifiers used from my neighbor. When picking an amplifier, or pair of amplifiers, the budget should dictate how much or little performance you want based on the capacity of the speakers you expect to support. In my installation, I used a single 4-channel MTX 400 Watt amplifier to power the four primary channels, and a 2-channel 200 watt MTX amplifier to power the subwoofer. When picking an amplifier, consider the total wattage as matched to the speakers being ordered, as well as the sound to noise ratio, and the Hz frequency range supported. If you intend to match this installation and mount them to the rear seat-back firewall, you'll want to ensure that the AMPs are no taller than 3"s in height. It may be more advantageous to buy a single 5-channel, or 6-channel amp instead of two amps. Prices for amplifiers range anywhere from $50 to $500.
SPEAKERSSpeaker selection is very important when attempting to match components in this installation. Because this install only includes an at best, mid-sized subwoofer, the four primary channel speakers will need to share much of the bass from the lower frequencies. In my installation, I used a set of German made MB-Quart speakers. I wanted the speakers to easily fit the stock enclosures, so I used a pair of 6"x8" MB-QUART DKE-168 speakers. MB-Quart speakers are known for their spectacular sound quality. Primarily used in the European market, they are typically used for classical and techno music as they typically provide the largest frequency range. As I stated, these speakers will need to share the bass, so if you cannot afford MB-Quarts, make sure your speakers have the widest frequency range possible. Most off-the-shelf quality replacement speakers will provide a typical range of 57Hz to 25,000Hz. The basic premise is, the lower the frequency, the lower the bass range that will be reproduced. The higher the number in the top of frequency range, the higher the sound frequency reproduction. For comparison, the MB-Quart DKE-168 speakers provide a range of 40 - 32,000 Hz, which is significantly better than the average "performance" replacement. *Remember, the speakers you order will only be able to function in the range of the amplifier that you buy, so make sure you do your homework and choose a speaker and amplifier combination that provides the matching range that fits within your budget.
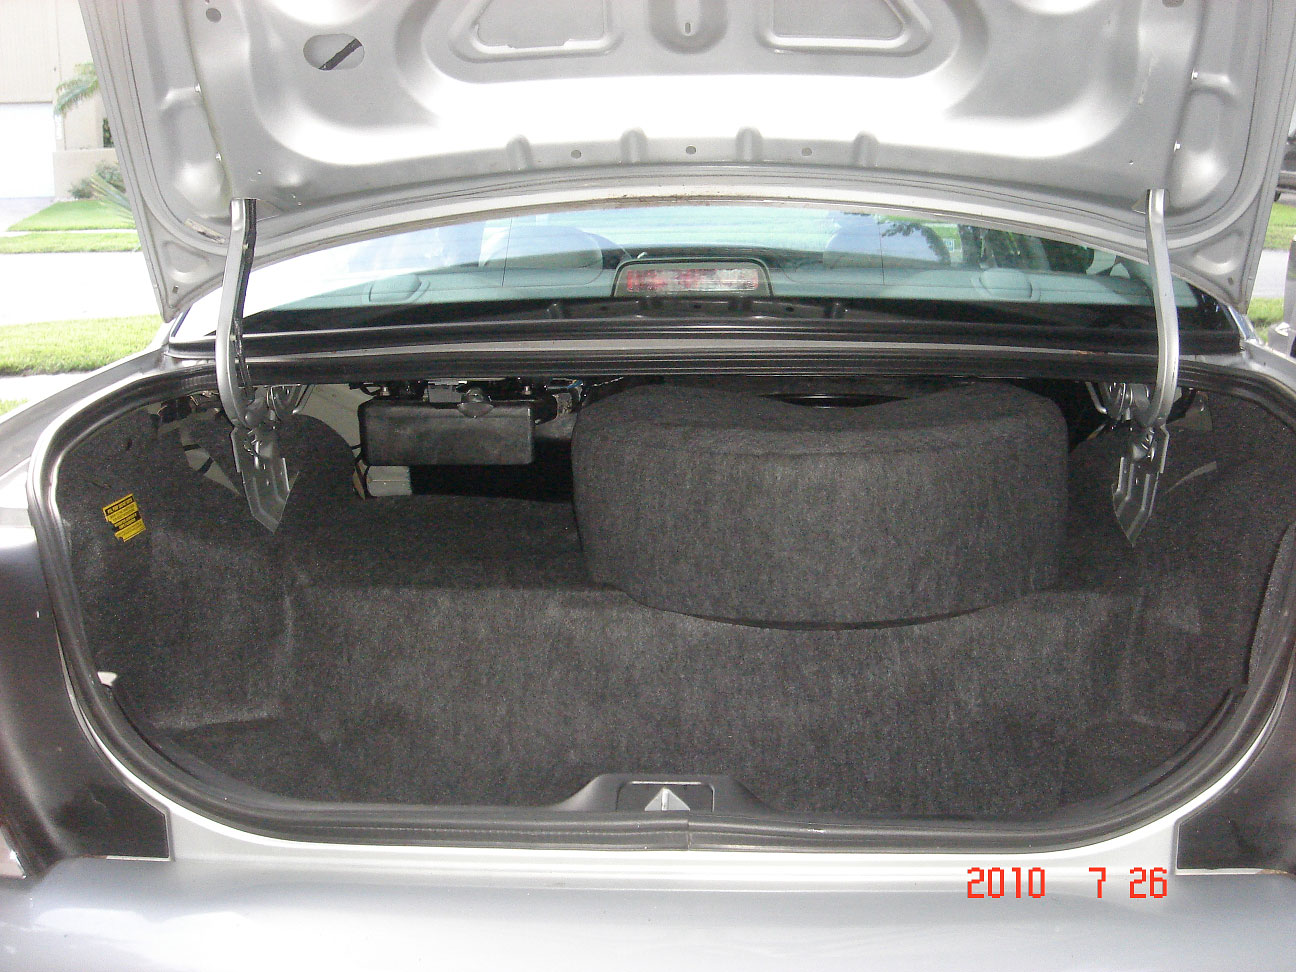
FACTORY SUBWOOFERFor a clean factory looking subwoofer install, this section will represent one of the harder aspects of the installation. Through the years of 1992 towards the end of production, various years were offered with a factory subwoofer option. This option was actually quite rare, and very few cars actually came with it. The good news is that the factory subwoofer is basically unchanged in the entire run with the exception of a single interchangeable bracket that's dependant upon MYs 92-97 and MYs 98-11. For 98+ Crown Victorias and Grand Marquis, you'll want to search for a subwoofer enclosure from a Grand Marquis or Mercury Marauder. NOTE: As awesome as it may look, the subwoofer enclosure from a Lincoln Town Car will NOT fit. This is because the enclosure (and opening) mount from the center, where as the opening on the CV/GMQ is left of center on the drivers side. An enclosure from a 92-97 CV/GMQ however, will fit a 98-11 and vice versa but the bracket will need to be modified. It is worth mentioning that either the top or bottom of this subwoofer box is a perfect location for mounting the MTX re-Q5 or any aftermarket sub amp if you can find one small enough to fit, this is what I chose to do. Details below: 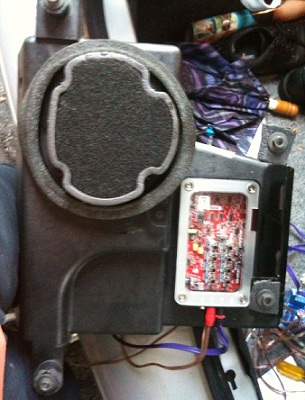
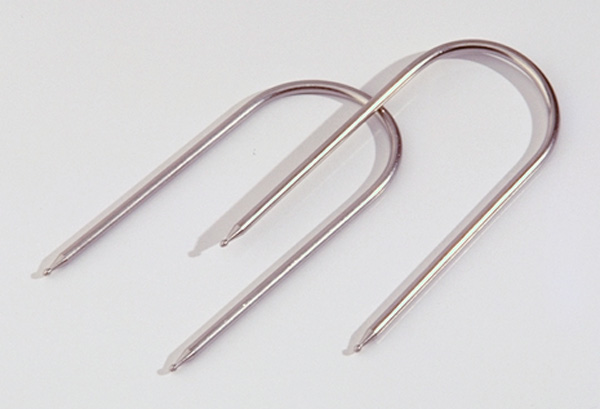
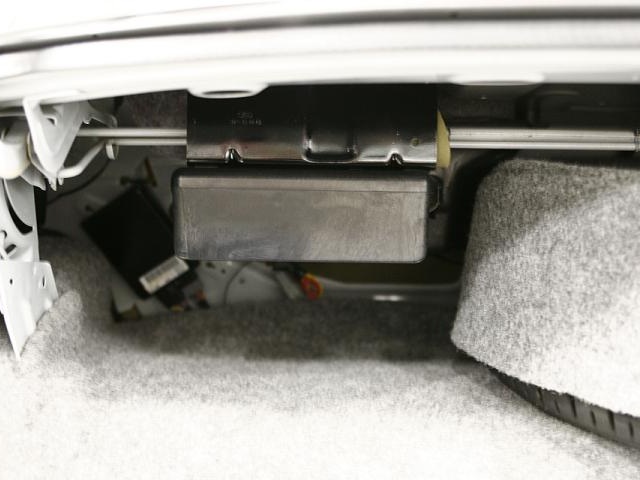
If you are planning on using the factory subwoofer enclosure in your upgrade, and you have a 98+ Crown Victoria, the rear mounting bracket will need to be modified. To complete installation, the bracket must be rotated 180 degrees (turned around), and have the trailing end cut off and re-welded to the other side. When finished, it should look like the completed bracket in the two images below (click them for a larger view). Fortunately, the hole for the subwoofer will already exist in most all 98+ Crown Victorias. All that's necessary is to punch out the already-perforated foam section from the sound deadener on the parcel shelf. You should not see the subwoofer through the parcel shelf after installation is complete.

SUBWOOFER SPEAKERThe final component in rounding out the complete overall sound package is the subwoofer mid-range speaker. As was explained previously in selecting your regular speakers, it's imperative that you select a subwoofer speaker that matches both the size of the factory sub enclosure, and appropriately matches the frequency and output range of your amplifyer. My 5.25" speaker has a frequency range that goes as low as 22 Hz. This is necessary to provide the focus of the lower frequency range as my speakers can only go as low as 40hz. In my installation, I purchased a generic MTX style Bazooka tube from an online retailer, and used the 5.25" speaker to fit into the Ford enclosure. Most of the aftermarket 5.25" mid-range subwoofers will have a larger than factory sized magnet, so the enclosure may need to be modified. For my application, this was done by using a heat gun and wooden mallet handle. Heat was applied to the inside (not outside) and the glass/resin was carefully massaged to accept the larger magnet. From the outside, of the enclosure, the bump-out is nearly unnoticable. I used a piece of Dynomat between the magnet and the enclosure where the magnet contacted the side. This was to prevent any vibrations that would incur from the close tolerance of the magnet. 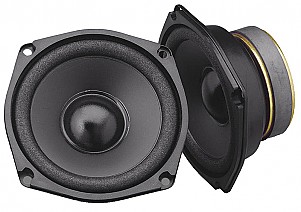
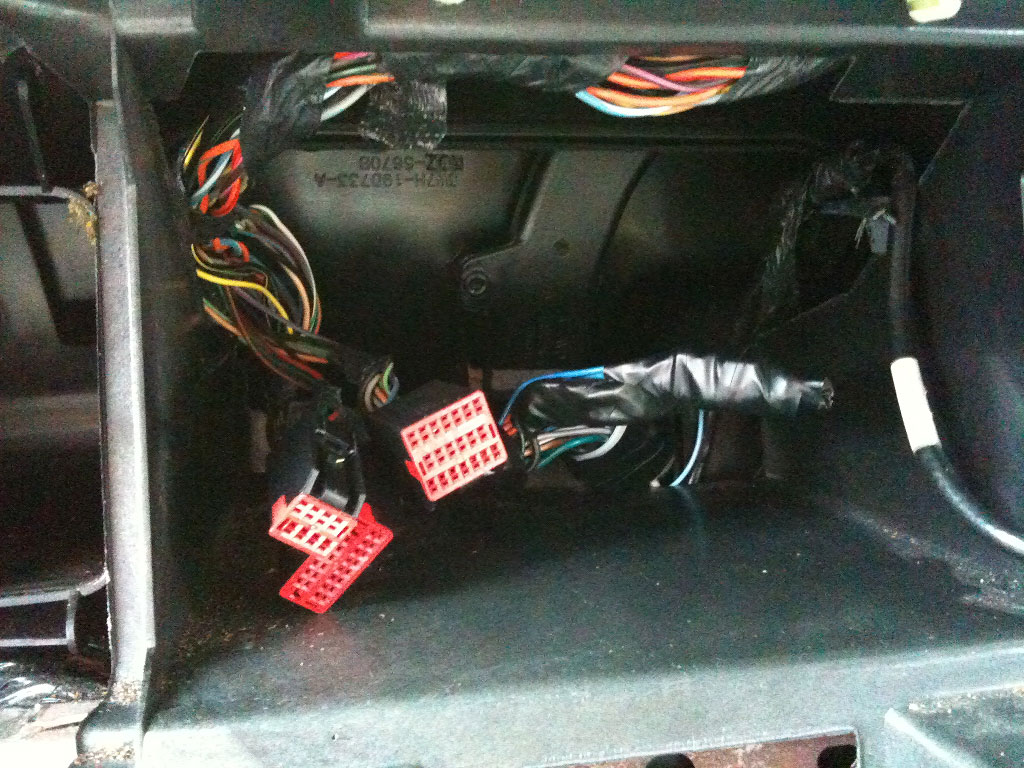
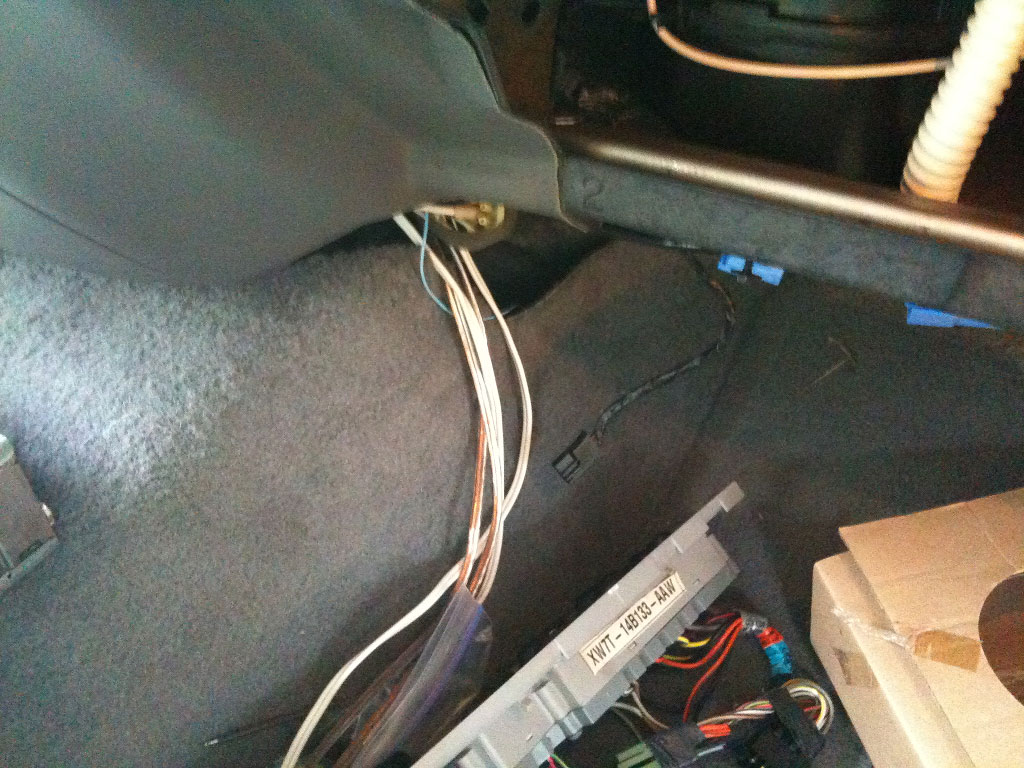
WIRINGLastly, wiring will also play an important part of the overall package. I recommend purchasing a subwoofer / amplifyer installation kit, as well as a radio adaptor kit. Both the ground and the main power feed to the amplifyers will need to connect directly to the battery. This can be done safely and discretely without having gawdy wiring exposed throughout the car. The power and ground feeds can be routed through the rear-seat firewall, through the passenger-side threshold, and into the forward most floor grommet. From there, it can be routed safely into the engine bay and to the battery. I wrapped both in plastic wire-loom so it would look OEM. For speaker wire, I used all high-quality gage speaker wire and completely bypassed the factory speaker wiring harness. I used an adaptor from a similar-year Town Car for the factory radio harness to the primary harness (as shown in image 1 and 2 below). This was in order to make use of the other connections. I then fed the entire speaker output to new wires, routed through the passenger side threshold to the re-Q5 signal processor (as shown in image 3 and 4). I then made a harness from the processor to the amplifyers, and from the amplifyers back to the individual speakers in the front doors, and the rear parcel shelf. The amplifyer will also need to have "switched" power. As the Crown Victoria does not have an antenna power lead, the "on-run" circuit (Pink w/ Black wire) can be used for switched power. This however means that the amplifyers will be on whenever the car is turned on, even if the radio is off. This is probably better so you don't get a delay or a "pop" when you turn on the radio.
The final product is spectacular. The radio looks and functions like a factory stereo system, but with the quality of a $1500 stereo system. The bass is not overwhelming, but is enough to feel impact. At no point do I feel that I need more bass since the MB-Quarts coupled with the MTX Mid-range already provide substantial bass; however, if I wanted to improve upon it even further, I could make use of what's called a "spare tire subwoofer." This is an aftermarket subwoofer which mounts inside of the spare tire. It can generally be hidden, and even tied into the existing amplifyers. I'm pretty pleased with this set-up. If you have any comments, please e-mail me at the link below.
|